🕯️ Creating a Halloween Centerpiece for Your Kitchen Island
Your kitchen island is more than just a place for morning coffee or quick meals — it’s the heart of your home. And during Halloween, it’s the perfect spot to make a dramatic seasonal statement. Whether you’re hosting a dinner party or just want your kitchen to feel festive and cozy, creating a spooky centerpiece adds instant mood and character.
With a mix of textures, tones, and just a touch of the unexpected, you can turn your kitchen island into a hauntingly beautiful focal point.
🎃 Step 1: Set the Foundation with a Wooden Candle Tray
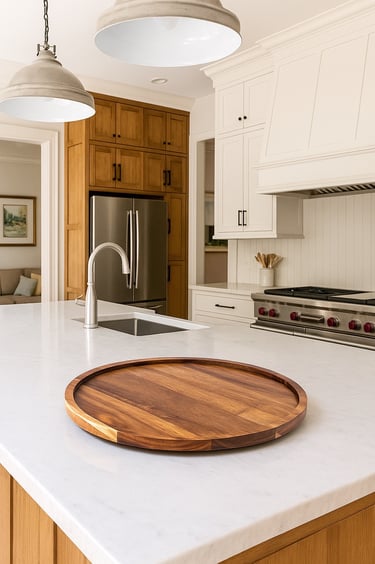
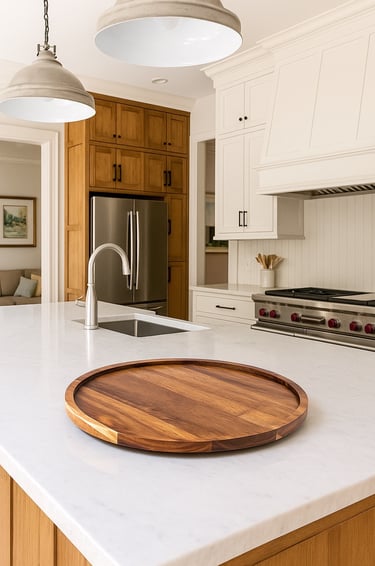
Every great centerpiece starts with a strong foundation, and the 11.5 Inches Candle Holder Tray Home Decor is the perfect base. This round wooden tray adds warmth and structure, grounding your Halloween display without overpowering it. Its natural tone softens darker elements and provides contrast for black and orange accents.
Place the tray in the center of your island to create a defined stage for your décor. If your island is large, consider slightly off-centering it for a more casual, layered look — especially if you plan to include candles or florals on one side.
This tray will hold the core of your display, keeping everything contained and giving your setup that “styled on purpose” feel rather than random clutter.
💀 Step 2: Add a Spooky Focal Point — the Skeleton
Now for the fun part — your centerpiece’s main character. The 15.7” Halloween Skeleton Decoration instantly gives your display personality and a playful edge. Its movable joints make it easy to pose, so you can have a little fun with its positioning.
Place the skeleton sitting on the edge of the tray or slightly leaning on one side as if it’s casually hanging out. Bend the legs so one knee is bent upward, giving you room to tuck in decorative accents like pumpkins or florals around it.
A tip for realism: angle its head slightly to one side so it looks engaged with the scene rather than stiff or symmetrical. You want it to feel charmingly mischievous — like it’s guarding the candy or watching over your Halloween spread.
🍂 Step 3: Add Cozy Texture with Velvet Pumpkins
Here’s where texture and warmth enter the mix. The DILATATA 3 Pcs Knitted Yarn Pumpkins are soft, plush, and beautifully rustic — the perfect balance to the hard skeleton and sleek tray. Their cozy knit texture adds a fall farmhouse feel that keeps the setup from leaning too gothic.
To style them creatively, give your skeleton something to “do”:
Place one pumpkin right beside the skeleton, grounding the scene and filling visual space on the tray.
Put one between the skeleton’s legs, creating a fun, natural placement that draws the eye.
And finally, rest one on its thigh as if it’s holding it — this playful touch adds personality and charm.
The result feels intentional, whimsical, and a little tongue-in-cheek — like your skeleton is helping decorate for the season.
If you want to elevate the scene further, scatter a few faux leaves or miniature pinecones around the pumpkins for a subtle autumn touch.
🧡 Step 4: Introduce Color and Light with an Amber Glass Vase
To add depth and sophistication, bring in the Torre & Tagus Solid Color Round Art Glass Vase in amber orange. The color is warm, elegant, and fits perfectly with the fall palette without being overly bright.
Place it behind or just beside the skeleton on the tray to create height variation — an essential step for making your centerpiece visually dynamic.
You can leave the vase empty for a minimalist look, or fill it with dark, dramatic stems to tie in your spooky elements. This is where the next product comes in beautifully…
🌿 Step 5: Add Drama with Black Antler Branches
The LIFKOME Artificial Antler Dried Tree Branches bring that dark, witchy edge that contrasts perfectly with your cozy pumpkins and warm amber vase. These faux black twigs have a sculptural, moody silhouette that adds both texture and height to your setup.
Arrange a few branches inside the amber vase, allowing them to fan out naturally. For extra visual interest, twist one or two branches slightly so they arch outward over the tray, framing the skeleton and creating movement in the design.
This simple addition instantly transforms your centerpiece from “cute Halloween” to “stylish and cinematic.” The black and orange pairing evokes classic Halloween vibes, but the clean shapes and minimalist approach keep it chic.
🧙 Step 6: Add a Witchy Touch with the Mini Cauldron
To complete your display, bring in the PRETYZOOM Mini Ceramic Cauldron Pot — a delightful little nod to Halloween’s magical side. Its small size makes it the perfect accessory without overwhelming the rest of your centerpiece.
You can use it in several ways:
Fill it with wrapped candies for a functional twist.
Add dried moss, faux spider webs, or glittery stones for a textural filler.
Or place a tealight inside (real or flameless) for a warm, glowing effect that plays off your amber vase and wooden tray.
Position the cauldron near the front of your tray, slightly off-center. Its matte black finish complements the skeleton and branches while adding balance to the warmer tones.
✨ Step 7: Balance and Layer for a Finished Look
Once all your main pieces are in place, take a step back and look at your setup as a whole. You want a balance of heights and textures:
The branches should provide your tallest point.
The skeleton and vase should form the central focus.
The pumpkins and cauldron serve as your cozy grounding pieces at the base.
If the arrangement feels heavy on one side, adjust the tray’s placement or shift items slightly until the composition feels natural.
For extra atmosphere, sprinkle a few small candles or LED tealights around the tray’s edge. The flickering glow will enhance the mood and make your display come alive after dark.
🕸️ Step 8: Optional Add-Ons
If you want to make your centerpiece even more magical, consider these finishing touches:
Spider webbing: Drape a thin layer across the tray for that haunted texture.
Mini potion bottles: Fill small glass jars with colored water or glitter and tuck them beside the skeleton.
Tiny LED lights: Wrap a short fairy light strand around the tray or vase for a soft sparkle.
These small touches turn your centerpiece into a conversation starter — detailed enough to impress, but simple enough to recreate.
💡 Step 9: Keep It Functional
Since this centerpiece lives on your kitchen island, you’ll want it to be practical too. Leave enough open space on the countertop for serving or prep, and make sure any decorative elements are easy to move when needed.
Avoid tall pieces that block sightlines if your island is used for entertaining — you want your guests to see and enjoy the setup without it feeling like a barrier.
The round tray helps here, as you can easily lift the entire display and relocate it when it’s time for baking or entertaining.
🌕 Step 10: Setting the Scene Around the Centerpiece
To make your kitchen feel cohesive, carry subtle touches of the same aesthetic around the room:
Add a few matching pumpkins or black candles to nearby open shelving.
Hang a black gauze runner or small Halloween banner across your range hood or cabinet handles.
Swap your kitchen towels for festive seasonal ones with pumpkins or bats.
These repeated accents create a sense of flow and make your centerpiece feel intentional rather than isolated.
🖤 Final Thoughts: A Little Spooky, A Lot Cozy
This Halloween centerpiece strikes the perfect balance between spooky and sophisticated. The wooden tray grounds it, the skeleton brings character, the velvet pumpkins soften the look, and the amber vase with black branches ties it all together with warm, moody charm.
It’s not just decoration — it’s a small seasonal story told through design. Whether you’re hosting friends, baking pumpkin treats, or just sipping coffee on a cool October morning, your kitchen island becomes a cozy Halloween focal point that captures all the best parts of the season: creativity, warmth, and a little bit of magic.
So gather your skeleton and pumpkins, cue up your favorite fall playlist, and create your own hauntingly cozy kitchen moment.
HOME
OCTOBER 28, 2025